Showing posts with label layout ideas. Show all posts

Monday, March 1, 2010

Product Preview: Graphic 45 Layout Project


Product Preview: Graphic 45
Date: Wednesday 3rd March
Time: 7-9pm
Fee: $25 which includes product/project packs, dessert supper and entry in to win Graphic 45 Prizes!

This is the layout project we will be making for Wednesday night's Product Preview event. Putting it on the computer loses its lovely soft detail colours - it really does look so pretty in real life.

This layout would suit any feminine themed photo. A black and white photo would also suit beautifully. We enlarged the photo on our copy machine and would be happy to do that for you as the photo needs to be about 8" x10" size.

Please bring:
  • A photo to create your layout. 8" x 10" (or smaller and we will copy it for you)
  • A scalpel/craft knife and mat
  • A pink or medium brown felt tip pen
  • Glue Dots
  • Photo splits and/or double sided tape
  • Fine tipped scissors
Phone 09 912 0665 to book your place at this fun event... mum tells me we are having Pavlova and fruit salad!

Friday, August 29, 2008

DT - Prima Layouts

Hi everyone finally sharing these layouts - they've been in the shop for a week or so now!
These layouts are using all Prima products - such lovely bright colours also flowers, crystals and transparencies.

I also did a card set with leftovers as well.

Friday, August 8, 2008

Product Preview: Heidi Grace "Kisses, Daydreams and Tales of Time" Layout sneak

Hi all,
Our latest Product Preview Event is happening this Thursday!
For those of you joining us or thinking of coming along (come!), here is the project sneak so you can plan what photo to bring:


This layout uses one 5"x7" photo, landscape orientation. Portrait orientation would also work fine. If possible, I suggest you bring one that you can mess with the background some :) See my one? The background actually had a pretty ugly sofa...not any more!

You will also need to bring your adhesives, paper trimmer, scissors and a black ink pad if you have one. We will also be using Kindyglitz which we have available to share but if you have your own one and don't wish to have to wait then you could also bring that too.

See you then!
Kathleen

Product Preview: Heidi Grace "Kisses, Daydreams and Tales of Time"
This Thursday 14th August at 7pm
Entry fee is $20. You will receive product/project kits valued at over $30 and automatically entered in to win some great prize draws.
Coffee, tea, juice and light refreshments will be served

Phone 09 912 0665 to book your seat.

Friday, July 18, 2008

Interview With... A NZ Scrapbook Design Team Member!

Interview With...
Because EVERYONE has a story. Share it ~ Scrapbook it

Hi all!
Last month we got to know Craig Leckner a little better in our Interview With... A Sales Rep article. You may remember he was just about to tip toe down the aisle...hold on, the gals do that!... well you know what I mean. Check out his fine self and stunning leading lady Nadine:

Glad you both had a wonderful day!


Interview With... A New Zealand Scrapbook Design Team Member: Sarah Groen
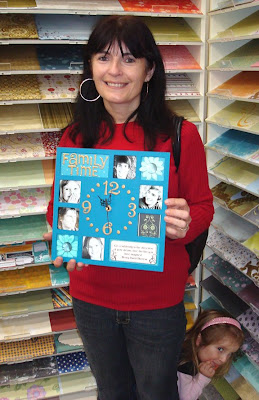
(This is such a cute photo - check out Sophie, Sarah's daughter. While I was taking the photo she was totally posing... something tells me she has seen a camera once or twice! hehhe)

As I sat down to interview Sarah a couple of things became apparent REALLY quickly. This chickie loves her family, loves her craft, is more than qualified to be in fact interviewing herself and that I MUST get a voice recorder… she says a lot of great stuff and speaks FAST!

Sarah has been on our Design Team for the past year and has produced many beautiful layouts and projects on display in our store for you to gain inspiration and ideas in those slightly stuck moments.


Sarah, tell us a little about yourself

I’m a Mum of five, three boys aged 17, 15 and 14 and two girls 11 and 3. Sophie was the big surprise – nice surprise! My family are from Holland, in fact Groen means Green in Dutch. I grew up in Manchester England and have been living in New Zealand for the last 17-18 years.


How did you get started Scrapbooking?

That’s an interesting story actually; I’ve been scrapbooking for about 2 1/2years starting when one of my sons spent time in hospital. Despite the difficulty of the hospital time we received a lot of support and fun. I made a mini-book showing our experience. Little did I know I was scrapbooking! Not long after that I found a book on scrapbooking and realized the connection. After that I was hooked.

Previously I had dabbled with different crafts such as cross stitch but wouldn’t really consider myself as artistic. I worked as a journalist before children, specifically medical journalism. I still do some part-time, mainly research on new drugs coming to the market. My head was more familiar with the scientific so scrapbooking came as a great discovery of a new skill to me. I have however always had a passion for photography so that tie-in nicely.


Please share with our readers how you came to be involved with NZ Scrapbook Company

Initially I started out as a customer at your (previous) Paul Matthews store, I was prodded about teaching back then (Kathleen: hehehe) then when the opportunity to apply for a design team position came up I applied – one step closer to teaching!


What do you think draws you to scrapbooking?

My photography is a big one. Also I love the products and I love being able to capture those little moments in time that would be otherwise lost or forgotten.


Sarah, I notice from your layouts you are particularly skilled at putting your heart into your journaling. How do you approach your journaling and do you have any tips for our readers?

I keep a diary and now I have a Blog. I like to write as things happen and carry a little notebook. I have a terrible memory so I need to write or I’ll forget! I also journal the way I’d speak often in the 1st person as if I was talking directly to the person in the photos.

What sparks you to start a layout? Where do you look for ideas?

A photograph is usually my starting point and will often springboard ideas. I also have recently enjoyed sketches in magazines.


What do you find most challenging?

Getting started with the arrangement and getting the actual layout of elements right. I also have trouble leaving white space.


Do you have a scrap space? Where about do you tend to scrapbook?

I use the dining room, with 5 children there just isn’t space for a dedicated room.


Current layout project?

I’m working on a layout of my three sons primarily using KaiserCraft papers. It’s a school photo of them in their uniforms – a first for them all together at school.


Do your children share your scrapbooking interests?

I have a son who is very naturally artistic. He does a lot of Japanese cartoon art and we share some of his texture templates he uses for that. He would be horrified to think of it as scrapbooking though! My daughter Natalie loves scrapbooking, she has come to many of the store events and kids classes.

Natalie and Sarah at our Product Preview: Diecuts with a View "All that glitters" Event

How would you describe your style?

Lots of layers of patterned paper and structured in my design. I like to cluster elements, lots of swirls, flourishes, and distressing techniques. Not sure that my style has a name. Lately I have been trying to less on a page, I aspire to different styles beyond my comfort. I would also like to try some pages on a smaller scale, I like the idea of some variation.


What do you see Sarah as bringing to the NZ Scrapbook design team?

Everyone on the team has a different style, I hope to bring a different angle distinctly my own. I aim to show new takes on product and share ideas that will inspire others in their own scrapbooking.


Beyond personal scrapping what other scrapbooking involvement do you participate?

In addition to the NZ Scrapbook Design Team I’m currently on the 2008 Elite Team for Up2Scrap Magazine and recently published in Scrapbooking Memories and For Keeps Magazine.


Where do you see the trends for scrapbooking going?

There are so many new products! Love the overlays that are available. I would love to see a more general awareness of scrapbooking. That is, recognized as more than just a hobby. It really is a therapeutic expression of feelings and I find it relaxing on a busy day. I love to muck about with paint and product for a few hours.


What advice would you offer someone just starting scrapbooking?

Browse different scrapbooking books and magazines and look for ideas and pages that appeal. Keep things basic. I also recommend getting the right tools from the beginning. Having good tools makes a big difference to your enjoyment and result. Also make sure you scrapbook photos that you love. There’s nothing worse than trying to scrapbook out of focus pictures or photos that don’t speak to you. Be patient with yourself, it takes time to develop your personal style.

Also for those more experienced scrapbookers I know from my journalism experience that if you start submitting your work for publication don’t be discouraged if your work is initially not accepted. A turn down is often not a reflection on your work but on what they are specifically looking for on their page presentation. Magazines could be looking for a layout of a particular colour scheme or what will work with other layouts they are using.


Time for the mandatory NZ Scrapbook Questions!


Stuck on a desert island with five things, what would they be?

Apart from the husband and kids? – DVD with Greys Anatomy, Laptop, huge selection of Basic Grey and Creative Imaginations Products, endless coffee and coffee machine, my ipod.


Favorite TV Show?

Grey’s Anatomy, Dexter, Oprah


If you could have lunch with anybody past, future or present who would it be?

Oprah Winfrey. She’s amazing, done so much for the world with her life. My hero.


Breakfast this morning?

Havent had it yet. Coffee. I’m terrible with breakfasts.


Five facts about Sarah?

  • I love coffee
  • I had a pet monkey when I was seven. I lived in Nigeria for 2years while my Dad worked for Michelin Tires. Actually I was born in Nigeria, but shifted early on to England and then back to Nigeria for that period. I would like to go back and visit there one day.
  • I’m scared of the dark
  • I’m scared of slugs, worms and slimy things.
  • As a child I dreamed of being an ice dancer even though I’d never been ice skating!
  • If I could travel anywhere it would be the cross country trip from Los Angeles finishing in New York


Finally, what would you others to know about Sarah?

That I love my husband and children. I am really enjoying where I am at in my life and there are a lot of things that I’d like to do.


Thank you Sarah for your creative and personal input into our design team and thank you for being part of our Interview With Series. We look forward to seeing more beautiful layouts from you and watching you live out your dreams!


Interested in reading our previous Interview With articles? Follow these links...


Monday, July 14, 2008

DT - KaiserCraft Layouts

Hi everyone, Andrea here showing you my latest designs that I've done for the shop. I got to use some of the gorgeous KaiserCraft range which I've used before to do one of their minialbums, but this time I did 3 layouts with it. I had papers (doublesided!), pearls, brads and wooden shapes to play with. I also had a little play with my Cuttlebug and some Fiskars punches too.


Thursday, June 19, 2008

Product Preview: Prima "Prima-licous!" Layout peek...

Hi All,
Quite a number of you have expressed how you like seeing the layout in advance of our Product Preview events to help you in selecting photos. So in our ever present desire to serve you excellently, here goes:

A little about this layout:
  • I have used a 5"x 7" Landscape orientation photo and is recommended. However this layout could be tweaked for 1-2 4"x 6" photos. If you don't have photos, don't despair! The transparency is open at the top so you could add a photo when you get home.
  • The layout was hard to photograph showing the true colours. The cardstock is khaki green/gold shades. Some of the kits are a green/brown/black alternative. Photos of neutral colours, heritage, scenic, close up people/kid images and black and white photos will work well.
  • The grid over the photo is a Prima Transparency (YUM!!!) it will be lucky dip from four different styles in your project packs. I have used the most challenging one in my sample - some of the others are more frame like in their style.
Recommended tools to bring:
  • Basic Kit (You may not use these things but its always worth bringing a paper trimmer, pencil, rubber, ruler etc just in case!)
  • Adhesives - Photo splits and a glue stick
  • Craft scalpel and cutting mat - you could get away with fine tip scissors for this project.
  • 5"x7" Landscape photo (see notes above)
  • Black journaling pen - journaling can also be added later
  • Black ink pad (optional)

So there you have it! Following the layout project you will be making a gorgeous Prima card and also receive a Take Home project of a neat folding book.

If you are thinking of coming to this event Product Preview: Prima "Prima-licous!" and haven't booked yet, do get on that phone won't you? This afternoon when I checked we were up to fifty participants and we don't want you to miss out!


Product Preview: Prima "Prima-licous!"
Monday 23rd June at 7pm
Event entry is just $20 which includes a product/project pack of over $30 value!
Automatic entry into win some awesome door prizes.
Tea and coffee and light supper at the completion of our project.

Phone 09 912 0665 to book your seat.

See you then!
~Kathleen

Thursday, June 12, 2008

Product Preview: Hot off the Press "Assembled with Love!" - Take Home Project

Hi folks,

Another fantastic night last night at Product Preview: Hot off the Press "Assembled with Love!". Look out for a full photo report on the event later this week.

For those of you who joined us last night, here are the Product Preview Take Home Project instructions:

I used my sewing machine instead of adhesive to assemble my layout (except the photos). If you have a sewing machine and haven't tried it on paper yet I would really encourage you to give it a go. Not only is it SUPER FUN, FAST, EASY... it looks VERY cool. However, if it doesn't float your boat or you don't have a sewing machine you have a few other options. You can:

  • Machine stitch but trim off the hanging threads for a less messy look
  • Draw stitching lines with a black journaling pen
  • Hand stitch (big stitches!)
  • Avoid the stitching all together for a clean crisp look.

Take Home Layout Instructions

    1. Trim the lighter grey Bazzill cardstock to 8”x 11 ½” and ink the edges with black stamping ink. Machine stitch or adhere to the lower portion of the layout.
    2. Trim the white vellum to 7 1/2” x 10 ¼” and machine stitch or adhere with vellum tape to the right side of your layout. If you machine stitch it to your layout embrace the texture of the wrinkles!
    3. Mount two 4”x6”photos to the black cardstock and machine stitch/adhere to your layout centering it to the middle portion of your vellum.
    4. Fold two pieces of ribbon in half and stitch/adhere to the top and bottom right corners of your mounted photos. Attach two jumbo brads from your embellishment kit on top of the ribbon.
    5. Stitch/adhere two flowers to the bottom right corner of your layout.
    6. Using an old oval photo frame (that’s what I used) or if you want a circle a small saucer, CD or template as a guide, position medium brads from your embellishment kit spaced around the edge of your oval/circle shape in the lower left corner of your layout. Mark their positions with a pencil and then create the holes and attach them to your layout. For added interest add one or two brads of a vibrant colour.
    7. Add handwritten journaling inside your brad oval/circle.
    8. Rub the complete layout outer edges with black ink. You may wish to add small rub ons, tiny journaling with a sharpie marker, a small photo punched with a circle punch or sticker initial to the jumbo brads.

I really enjoyed the monochromatic feel to this layout with the small accent of colour. Hope you enjoy yours too!

~Kathleen

Photos by Fiona Peirson


Friday, June 6, 2008

BasicGrey Sugared

Hi everyone, Andrea from the DT here.
I've just finished 3 layouts using product from the BasicGrey Sugared line - papers, adhesive chipboard shapes and buttons. I've also added in some BasicGrey letter stickers from the Sultry line for the titles and Winterland stamps (on the Huka Falls layout). I really enjoyed doing these, its a fun line to work with.


Tuesday, May 20, 2008

Cricut Expressions Class - Tomorrow...beautiful!

Hi All,
Wendy Wonder has produced the most beautiful Cricut Expressions class... and we still have a few spaces!
Tomorrow, Wednesday 21st May 7 -9pm

She will help you create this amazing page and we provide all the materials! You just need to bring yourself, your Cricut Expressions machine, the two cartridges that come with your machine and mats, adhesives and basic kit.

Class and materials fee is just $20. Phone 09 912 0665 to book your place.

Byes for now!
~Kathleen


Tuesday, May 13, 2008

Wonderful Walnut Ink!

Hi All,
Now I could have come up with as many W alliterations as possible (I had to google the word Alliteration to make sure I had the meaning right! heheh)... wonderfully wacky wild walnut.. but lets just get straight to the point (come'on Kathleen! get to it!) how to use:

Walnut Ink

Last night at our Product Preview: Core'dinations "It's what's inside that counts" (so fun!) our lucky participants received among other things, a Walnut Ink sample to take away.

The brand we stock are the Walnut Ink Crystals by Tsukineko and yes, Walnut ink really is made from walnut husks! Used at a high strength it is a favourite among Calligraphers but for scrapbooky, card makey, altery, collagey (do made up words with y's on the end count as an alliteration too???) purposes we generally use it much more dilluted to create a vintage or aged effect.

The instructions are: 1 level teaspoon of crystals per 1/2 cup of hot water.
To be honest, I never measure. I have a feeling this is actually stronger than I would make it. Start off with putting your sample sized portion into a small tupperware (one of those smallest Gladware containers would be perfect and add about 1/4 cup of hot water and dissolve. Then on a scrap piece of paper brush or sponge a little of the ink to see how dark it comes out. You can then add more water to dillute further if desired. I usually go for a med - light brown/tan. The neat thing is this stuff stores forever! I just keep adding more crystals and more water... perhaps not the 'right' way, but it works :)

Ideas for using Walnut Ink:
  • Create aged paper from white paper (sponging).
  • Tone down a too bright paper (also sponging)
  • Paint or draw a design with the ink (ink pens, water brushes filled with ink, regular paint brushes)
  • Drip ink spots and dots for a vintage effect.
  • Dust with crystals and spritz with water - super cool.
Here's a layout I did a few years ago for the Book of Me series of classes we were running. The background started off as just plain cream cardstock but I wanted it to appear like an old newspaper so I sponged it with walnut ink and then added darker walnut ink splotches for good measure.

Hmmm... if you read the layout you can work out how old I am... but you wouldn't do that would you? Hey! I can hear you counting!! hehee.. ok don't tell though will you :)
By the way, just for interests sake - see that title? hand cut with a scalpel... that was BEFORE the days of the Cricut and Cuttlebug! To make your own layout like this HERE is an interesting website where you can select a date of your choosing and it brings up historical events.

And if you wanted to make your own walnut ink from scratch HERE'S another interesting website. Where you would come up with a five gallon bucket of black walnuts I'm not too sure!

Anyways I hope that gets you started with inking! If you didn't make it to our Preview Event last night we made up a few extra sample containers. They are in store now and are just $1. Alternatively the lovely big jars of ink crystals are also available - 56g for $17.95

Byes for now!
~Kathleen